Image to PDF Conversion using Google Script
Introduction
There are diverse providers of services for collecting data from customers and users through forms and survey. However, Google form provides the flexibility of scripting and extending the data collection and form submission processes when users interact with the forms, surveys or opinion polls created using Google form.
For most Google form creators, the default behaviour and functionalities provided out of the box can serve the data collection purposes. This is because Google makes it easy to access the data provided by users when they filled the form through response sheet attached to the form while additionally providing a response page for viewing the responses with pictorial and graphical representation of the responses.
File of supported format and types can be added to a created form, making it easy to accepts files from users. When a form has file upload in it, Google saves the uploaded file in the Google drive of the Google account that owns the form and provides the accessible url in the response sheet, giving the flexibility to download the file using the provided url.
While files of allowed format can be uploaded through the form’s file upload, Google doesn't provide an explicit way of converting files from one format to another, let's say from text or image to pdf during or after upload through the form.
For example let's say we have a form that allows users to upload invoice files which can be a pdf file or an image taken with their mobile devices, like in the screen below. There might be a requirement that necessitate the conversion of the images to pdf and then send to an email address for processing.

There is a well known approach which is to get the bytes of the uploaded image file, encode it into base64 and create an HTML image tag with the encoded bytes passed into the src attribute. After which Utilities class newBlob function is used to create an HTML blob from the content before finally getting a pdf blob from it, see the snippet below
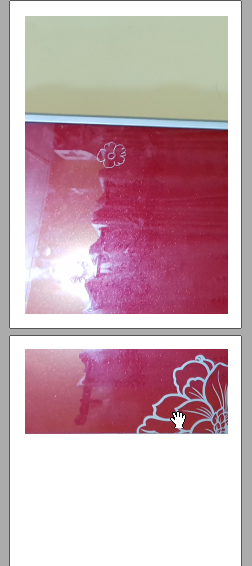
This approach works and generates pdf file from the uploaded image. However, there is a limitation to it, when mobile users upload image files by directly taking the pictures using the phone camera, the above snippet doesn't handle the orientation of the image correctly, hence the final pdf has images distorted from the original look.

This issue can be fixed by using a different approach which is to create on the fly a temporary Google document and insert the image into the body of the document, save it and generate a pdf blob from the created file. Using this approach, the orientation of the image is always intact without being distorted. The approach uses Drive Service for creating the temporary document which the image is inserted.

There are diverse providers of services for collecting data from customers and users through forms and survey. However, Google form provides the flexibility of scripting and extending the data collection and form submission processes when users interact with the forms, surveys or opinion polls created using Google form.
For most Google form creators, the default behaviour and functionalities provided out of the box can serve the data collection purposes. This is because Google makes it easy to access the data provided by users when they filled the form through response sheet attached to the form while additionally providing a response page for viewing the responses with pictorial and graphical representation of the responses.
File of supported format and types can be added to a created form, making it easy to accepts files from users. When a form has file upload in it, Google saves the uploaded file in the Google drive of the Google account that owns the form and provides the accessible url in the response sheet, giving the flexibility to download the file using the provided url.
While files of allowed format can be uploaded through the form’s file upload, Google doesn't provide an explicit way of converting files from one format to another, let's say from text or image to pdf during or after upload through the form.
For example let's say we have a form that allows users to upload invoice files which can be a pdf file or an image taken with their mobile devices, like in the screen below. There might be a requirement that necessitate the conversion of the images to pdf and then send to an email address for processing.

There is a well known approach which is to get the bytes of the uploaded image file, encode it into base64 and create an HTML image tag with the encoded bytes passed into the src attribute. After which Utilities class newBlob function is used to create an HTML blob from the content before finally getting a pdf blob from it, see the snippet below
function getUploadedInvoice(fileId){
var uploadedFile = DriveApp.getFileById(fileId);
var downloadUrl=uploadedFile.getDownloadUrl();
var mimeType=uploadedFile.getMimeType();
var filename=uploadedFile.getName();
var blob=null;
var fileType=mimeType.toLowerCase();
if( fileType=="image/png" || fileType =="image/jpeg"){
var base64 = Utilities.base64Encode(uploadedFile.getBlob().getBytes());
var html = ' ';
blob = Utilities.newBlob(html, MimeType.HTML).setName(filename + ".pdf");
blob = blob.getAs(MimeType.PDF);
}
else if(fileType == "application/pdf"){
blob = uploadedFile.getAs('application/pdf');
}
return blob;
}
This approach works and generates pdf file from the uploaded image. However, there is a limitation to it, when mobile users upload image files by directly taking the pictures using the phone camera, the above snippet doesn't handle the orientation of the image correctly, hence the final pdf has images distorted from the original look.

This issue can be fixed by using a different approach which is to create on the fly a temporary Google document and insert the image into the body of the document, save it and generate a pdf blob from the created file. Using this approach, the orientation of the image is always intact without being distorted. The approach uses Drive Service for creating the temporary document which the image is inserted.

function getUploadedInvoice(fileId){
  var uploadedFile = DriveApp.getFileById(fileId);
  var fileType=uploadedFile.getMimeType().toLowerCase();
  var blob=null;
  if( fileType=="image/png" || fileType =="image/jpeg"){
    var image = uploadedFile.getBlob();
    var filename=uploadedFile.getName();
    var doc = DocumentApp.create(filename);
    var insertedImage = doc.getBody().insertImage(0, image);
    resizeImage(insertedImage);
    doc.saveAndClose();
    blob = doc.getAs(MimeType.PDF);
    tempFileId=doc.getId();
  }
  else if(fileType == "application/pdf"){
     blob = uploadedFile.getAs(MimeType.PDF);
  }
  return blob;
}

function resizeImage(image) {
    var height = image.getHeight();
    var width = image.getWidth();
    var factor = height / 800;
    image.setHeight(height / factor);
    factor = width / 540;
    image.setWidth(width / factor);
}
Share this page on
1
People Like(s) This Page
 Permalink
comments powered by Disqus


